Friday, November 22, 2013

Barcode Scanner and Generator (Version 2)


On November 4th, 2012 we launched QR Code Scanner and Generator V1

(http://abhinavasblog.blogspot.sg/2012/11/creating-your-qr-code-scanner-and.html)


THANK YOU FOR YOUR SUPPORT TILL DATE


Since then we made numerous progres on the library and updated it time and again.

Time has now come to welcome better smarter version of BarCode fragment library.


Please welcome Barcode Fragment Lib V2

The library is located at https://code.google.com/p/barcodefraglibv2/ .The library has better features and more detailed samples.

Unlike previous versions you can now simply add a jar in your app and start using the complete scanner functionality.
You can download the jar's from here: BarcodeLibraryFragment and Barcode Core (Please note both jars are mandatory)

Library now also support some added barcode types (e.g Aztec, Datamatrix).

Please read the wiki located at https://code.google.com/p/barcodefraglibv2/wiki/HowTo to start using the library.

There is a sample implementation for easier understanding of usage at : : https://code.google.com/p/barcodefraglibv2/wiki/SampleImplementation

I am also looking for the contributors for maintaining the library. Please let me know if you are interested to enhance this library.

Friday, November 8, 2013

Install Hangouts 2.0.122

Google has released Hangouts 2 which gives you additional benefits of sending and receiving SMS right from your hangout application.

Hence, the over all experience of application is much more smoother and definitely richer.

You can download the file from here

Features:


The new Hangout first got released as Version 2.0.12 which was having some issues with Video chats but the current version i.e Version 2.0.122 is expected to resolve that.
Currently the APK is only for Nexus 5 in the Android Market but it ain't gonna stop you from getting it ;)

Lemme know about your experience with this version.

Monday, November 4, 2013

Setup Android Studio On Ubuntu 13.10

Android Studio is still in its early development days. Hence, it's still not completely polished.

Yet again its one of the most powerful tools out there in the market which can be very useful if you start using them :D


At this point of time if you want to start Android Studio, you need to run a shell file every time, which no doubt is not so user friendly and may become frustrating as you always have a Terminal window associated to it, resulting multiple open windows on your desktop.

In my previous post i told you guys how to setup android and other things on Ubuntu system (Including java)

In this post ill try to help you setup Android Studio.

Just follow below:

  1. Start Terminal
  2. $ sudo -i (It will ask for password)
  3. cd /usr/share/applications
  4. nano AndroidStudio.desktop
  5. Enter following  in the file
[Desktop Entry]
Type=Application
Terminal=false
Name=Android Studio
Icon=
Exec=

That's it !! you are done!

Now simply go in your Applications you will find Android Studio application which you can click and start anytime you like. You can also drag it down to quick launcher.

Hope it helped!

Tuesday, October 22, 2013

Working With Ubuntu 13.04 and 13.10 Java JDK/JRE ,Chrome and Android

Hi All,

Recently i updated my Linux system to 13.10 and to my greatest pleasure and frustration i ran into couple of issues :D

Here is a brief of what i faced and how it got resolved, hope this will help you get your stuff too! :)

In this post we will install Chrome, Instal Java7 and setup Android SDK. So lets begin

INSTALLING GOOGLE CHROME
Well i am a great fan of Google Chrome but was upset with the fact that Google has not yet updated their application to support latest libraries, thus when you install Ubuntu 13.04 and above you will find that there are couple of dependencies that are unsatisfied.

Well there ain't much you need to do! :)

Install this depending on your OS installation

For 64 bit Systems: libudev064bit.deb
For 32 bit Systems: libudev032bit.dev

Once above is installed you can simply download the application from google and run the deb file. You should be able to install Chrome now :)


INSTALLING JAVA
This has been a very prolonged issues as Oracle as not been able to make its way in Canonical repositories andUbuntu has been pushing openjdk and other open Java.
Again if you are a developer the you will be better off with Oracle Java only.

No worries simply follow the following steps:

  1. First remove openjdk from your system: sudo apt-get purge openjdk*
  2. Now install oracle java 7 in ubuntu 
  • sudo add-apt-repository ppa:webupd8team/java
  • sudo apt-get update
  • sudo apt-get install oracle-java7-installer
  • Follow the installation steps
That its now you can check installed java version by typing  : java -version


CONFIGURING ANDROID SDK
Even if you have downloaded Android SDK you will not be able to run adb you will get follwoing issue all the time. error=2 No such file or directory' while attempting to get adb version from

This is due to missing ia32-lib which is not available for 13.04 and above hence you need to individual install libraries required for adb
Type following command


sudo apt-get install libc6-i386 lib32stdc++6 lib32gcc1 lib32ncurses5 lib32z1

And you are done :)
Hope you have been able to resolve all your issuesand now enjoy your Linux


Thursday, October 17, 2013

Sync and Backup For Free!!!

I have been always wondering if i could get some backing up solution which can help me to save and sync files between my computers and Mobile devices.

Above all i wanted all these photos and files to be PRIVATE!!! i don't want them to be saved on a remote server!!!

I believe this is a generic requirement and is applicable to every one out there!
  • Ever wondered how to backup photos from your Mobile phone in full resolution 
  • Wanted to synchronize files between your own computers
  • Wanted to share files between friends of HUGE size
  • Wanted the files to be secure
  • Wanted all the above for free for LIFETIME??
HOW TO GET IT ALL??
Simply follow the below

Install BitTorrent Sync : http://labs.bittorrent.com/experiments/sync.html
Its available for all the platforms so you should be just fine


Steps of Setup:
  1. Install the application on all your devices
  2. Depending on the device (Mobile / Computer) you will get option to choose folder for Syncing/Sending/Backing up your files
  3. Once selected you will be provided a code.
  4. Simply enter the code in any other device you want to sync with
  5. You are Done!!!
  6. You can reffer to http://labs.bittorrent.com/experiments/sync/mobile.html for more details of installation.
Cheers!!


Monday, September 30, 2013

Android's Device Management

Hey There!!!

i know it has been quite long since i updated you guys with any relative news..

APOLOGIES.. :)

Most of us are holding Super Charged Android devices, its just that few of us know how to get the best out of it.. :D
So today i'll try to help you good guys out with one neat trick which you can use to super secure your android devices.

DEVICE ADMINISTRATION

Relax !!!!!!
We will setup and will show you a pro in using device admin (Administration) without throwing away a sweat!!!!


BUT WHYYY??

Using device administration you can do following

1. Ring your device remotely
2. Locate your device
3. Lock your phone and Change password
4. Wipe your device remotely

And no need for ANY third party apps (Non Google App) to manage and secure your mobile phone.

Just follow these 3 Steps
1. Click on Google Settings Application


2.  Click on Android Device Manager


3. Check on Both Check boxes


4. You will be asked for confirmation on Android Device Manager screen, Click on Activate


5. Once clicked you will be back on Google Settings Screen, just close the app


THAT's IT!! You are done!!!

Now if you want to play around simply click on this link
https://www.google.com/android/devicemanager?hl=en&u=0


ENJOY!!!!

Wednesday, June 26, 2013

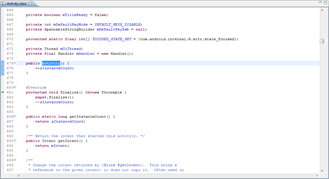
Browsing through Android Source Code

Many time we want to understand how are Android API's implemented,
For example when you are using a API and want to understand the implementation of that api, you certainly don't want to browse through entire Android source to check what the implementation, it just kills the fun.

From

To


Here are the simple steps to understand how to do this!


WHAT ALL IS REQUIRED?
To accomplish this you need 2 things
  1. Eclipse
  2. Internet connection
STEPS:


Once completed accept changes and restart your eclipse.
Now next time you wanna checkout the source just check for definition of class/function. :)


Saturday, May 25, 2013

Transition View Pager

Its been sometime when we talked anything core technical and made our hands dirty :)

Well happy to announce of releasing a new open source project named TransitionViewPager.

The credit goes to JazzyViewPager i have only extended the functionality to Fragments.

What's This Now !!!

Its a ViewPager that allows you to do more than just showing your content.. it allows you to animate during transition.
You can relate it to something like your application screen ( Android original Flavour )


Ok!!!


Kool! But how long will it take to implement?

May be 2~10 mins (depends on your typing speed :D)

Enough talk lets fight !! fafamuii!

Step 1:
layout.xml

<com.abhi.animated.TransitionViewPager xmlns:android="http://schemas.android.com/apk/res/android"
    xmlns:tools="http://schemas.android.com/tools"
    android:id="@+id/pager"
    android:layout_width="match_parent"
    android:layout_height="match_parent" >

<android.support.v4.view.PagerTitleStrip
        android:id="@+id/pager_title_strip"
        android:layout_width="match_parent"
        android:layout_height="wrap_content"
        android:layout_gravity="top"
        android:background="#33b5e5"
        android:paddingBottom="4dp"
        android:paddingTop="4dp"
        android:textColor="#fff" />

</com.abhi.animated.TransitionViewPager>


Step 2:
Activity.java
just append this

mViewPager = (TransitionViewPager) findViewById(R.id.pager);
mViewPager.setAdapter(mSectionsPagerAdapter);

mViewPager.setTransitionEffect(TransitionEffect.CubeOut);


Yepp!! you are all done!!! there are wide variety of stuffs that you can do with this... keep playing with TransitionEffect and see effects in application :)

WAIT WAIT WAIT!! where to get it from?

Wednesday, April 3, 2013

Connecting your Bluetooth Keyboard with Ubuntu

I recently purchased Logitec Keyboard K810 ( Bluetooth ) as i wanted to have just one keyboard for all my devices ( Computer , Laptop and Phone )

It is no doubt an awesome device. But i soon realized that i was having a super hard time to connect it with my linux system.Connecting with my Android Tablet was a breze but when it came to my Ubuntu System i was sooo dead.Well finally after couple of tries found out the way to do it super simply.

set keyboard discoverable ( All commands are to be used on Terminal unless stated otherwise)

  • "hcitool scan" and copy mac address XX:XX:XX:XX:XX:XX
  • "sudo bluez-simple-agent hci0 XX:XX:XX:XX:XX:XX"
    which will hopefully return somthing like:
    "DisplayPasskey (/org/bluez/943/hci0/..., 123456)"
  • Just type the nubmber at the end ( in the above case its 123456 and press enter on your bluetooth keyboard.
  • on success you should get "Release" and "New device (/org/bluez/..."
  • now set device as trusted "sudo bluez-test-device trusted XX:XX:XX:XX:XX:XX yes"
  • you might have a connection now, but i still needed to:
    "sudo bluez-test-input connect XX:XX:XX:XX:XX:XX"
Congratulations you have successfully paired your new device :)

Monday, March 4, 2013

Expense Tracker

Hey All,

It has been quite sometime we did any fun stuff.
Well have been busy with lots of things.. practically SUPER LOTS ...

Anyways, will tell you about those some other time.

Today announcing a new app in market named as Expense Tracker.

Well, its not exactly a new concept and its not like i haven't rolled something similar before. If any of you remember i did roll out an application for devices up to 2.3 a similar application named as Easy Pocket Lite.

The new application is based on rich android UI deisgn following HOLO theme application helps you manage your expenses in a really easy and quick way. It has almost zero setup time.

All you need to do is to go to settings -> Enter your monthly amount (Something like your salary) -> Enter your currency. AND YOU ARE DONE :

Every time you want to add a transaction simply click on   + and follow a very minimal steps to add in the transactions.

You can also view your transactions in multiple ways.